amazon-affiliate-banner1

Tuesday, 2 April 2019

Vegetable Fried Rice | Veg fried rice | Chinese fried rice

chitrannaa.blogspot.com
 

Preparation Time        20 Minutes
Cooking Time             20 Minutes

Recipe video :


Ingredients :


  • Basmati or jeera rice 2 cups
  • Ghee 1 tablespoon
  • Butter 2 tablespoon
  • Groundnut oil 1 tablespoon
  • Pepper powder 1/2 tablespoon
  • Garlic Ginger paste 1 tablespoon
  • Chilli sauce 1 tablespoon
  • Soya sauce 1 tablespoon
  • Tomato sauce 1 tablespoon

  • Finely chopped onion 1 cup
  • Nicely diced carrots 1 cup
  • Nicely diced capsicum 1 cup
  • Finely chopped spring onion ( optional ) 1 cup
  • Salt to taste


Procedure :


  • Wash and soak rice for half an hour.
  • Cook 1 measure rice with 1 1/2 measure water. Here I have taken 2 cups of rice, so I have added 3 cups of hot water and cooked the rice with a spoonful of ghee so that the rice is cooked with the grains soft yet nicely separated.
  • Put the cooked rice in a wide vessel to cool and let the grains get separated.


  • Take carrot and capsicum pieces in two separate bowls.
  • Boil water and pour it on these veggies, add a teaspoon of salt and cover with a lid.
  • After 2-3 minutes, drain the water and hold the vegetables under running water to stop them from cooking further and getting soft. By this way and because the salt is added, the vegetables retain their colour and the crunchiness.


  • In a thick bottomed kadai, heat groundnut oil and butter.
  • Once it melts add garlic ginger paste and saute for a minute.
  • Next add onions and spring onions and saute till onions turn golden brown.
  • After that add soya sauce, chilli sauce and tomoto sauce and mix well.
  • Then add pepper powder and salt.
  • Finally add the cooked rice and mix lightly, taking care not to break the grains.
  • Serve hot with tomoto sauce.


You may also check our other delicious bhaaths and Pulav recipes :

Khara Pongal


Thursday, 28 March 2019

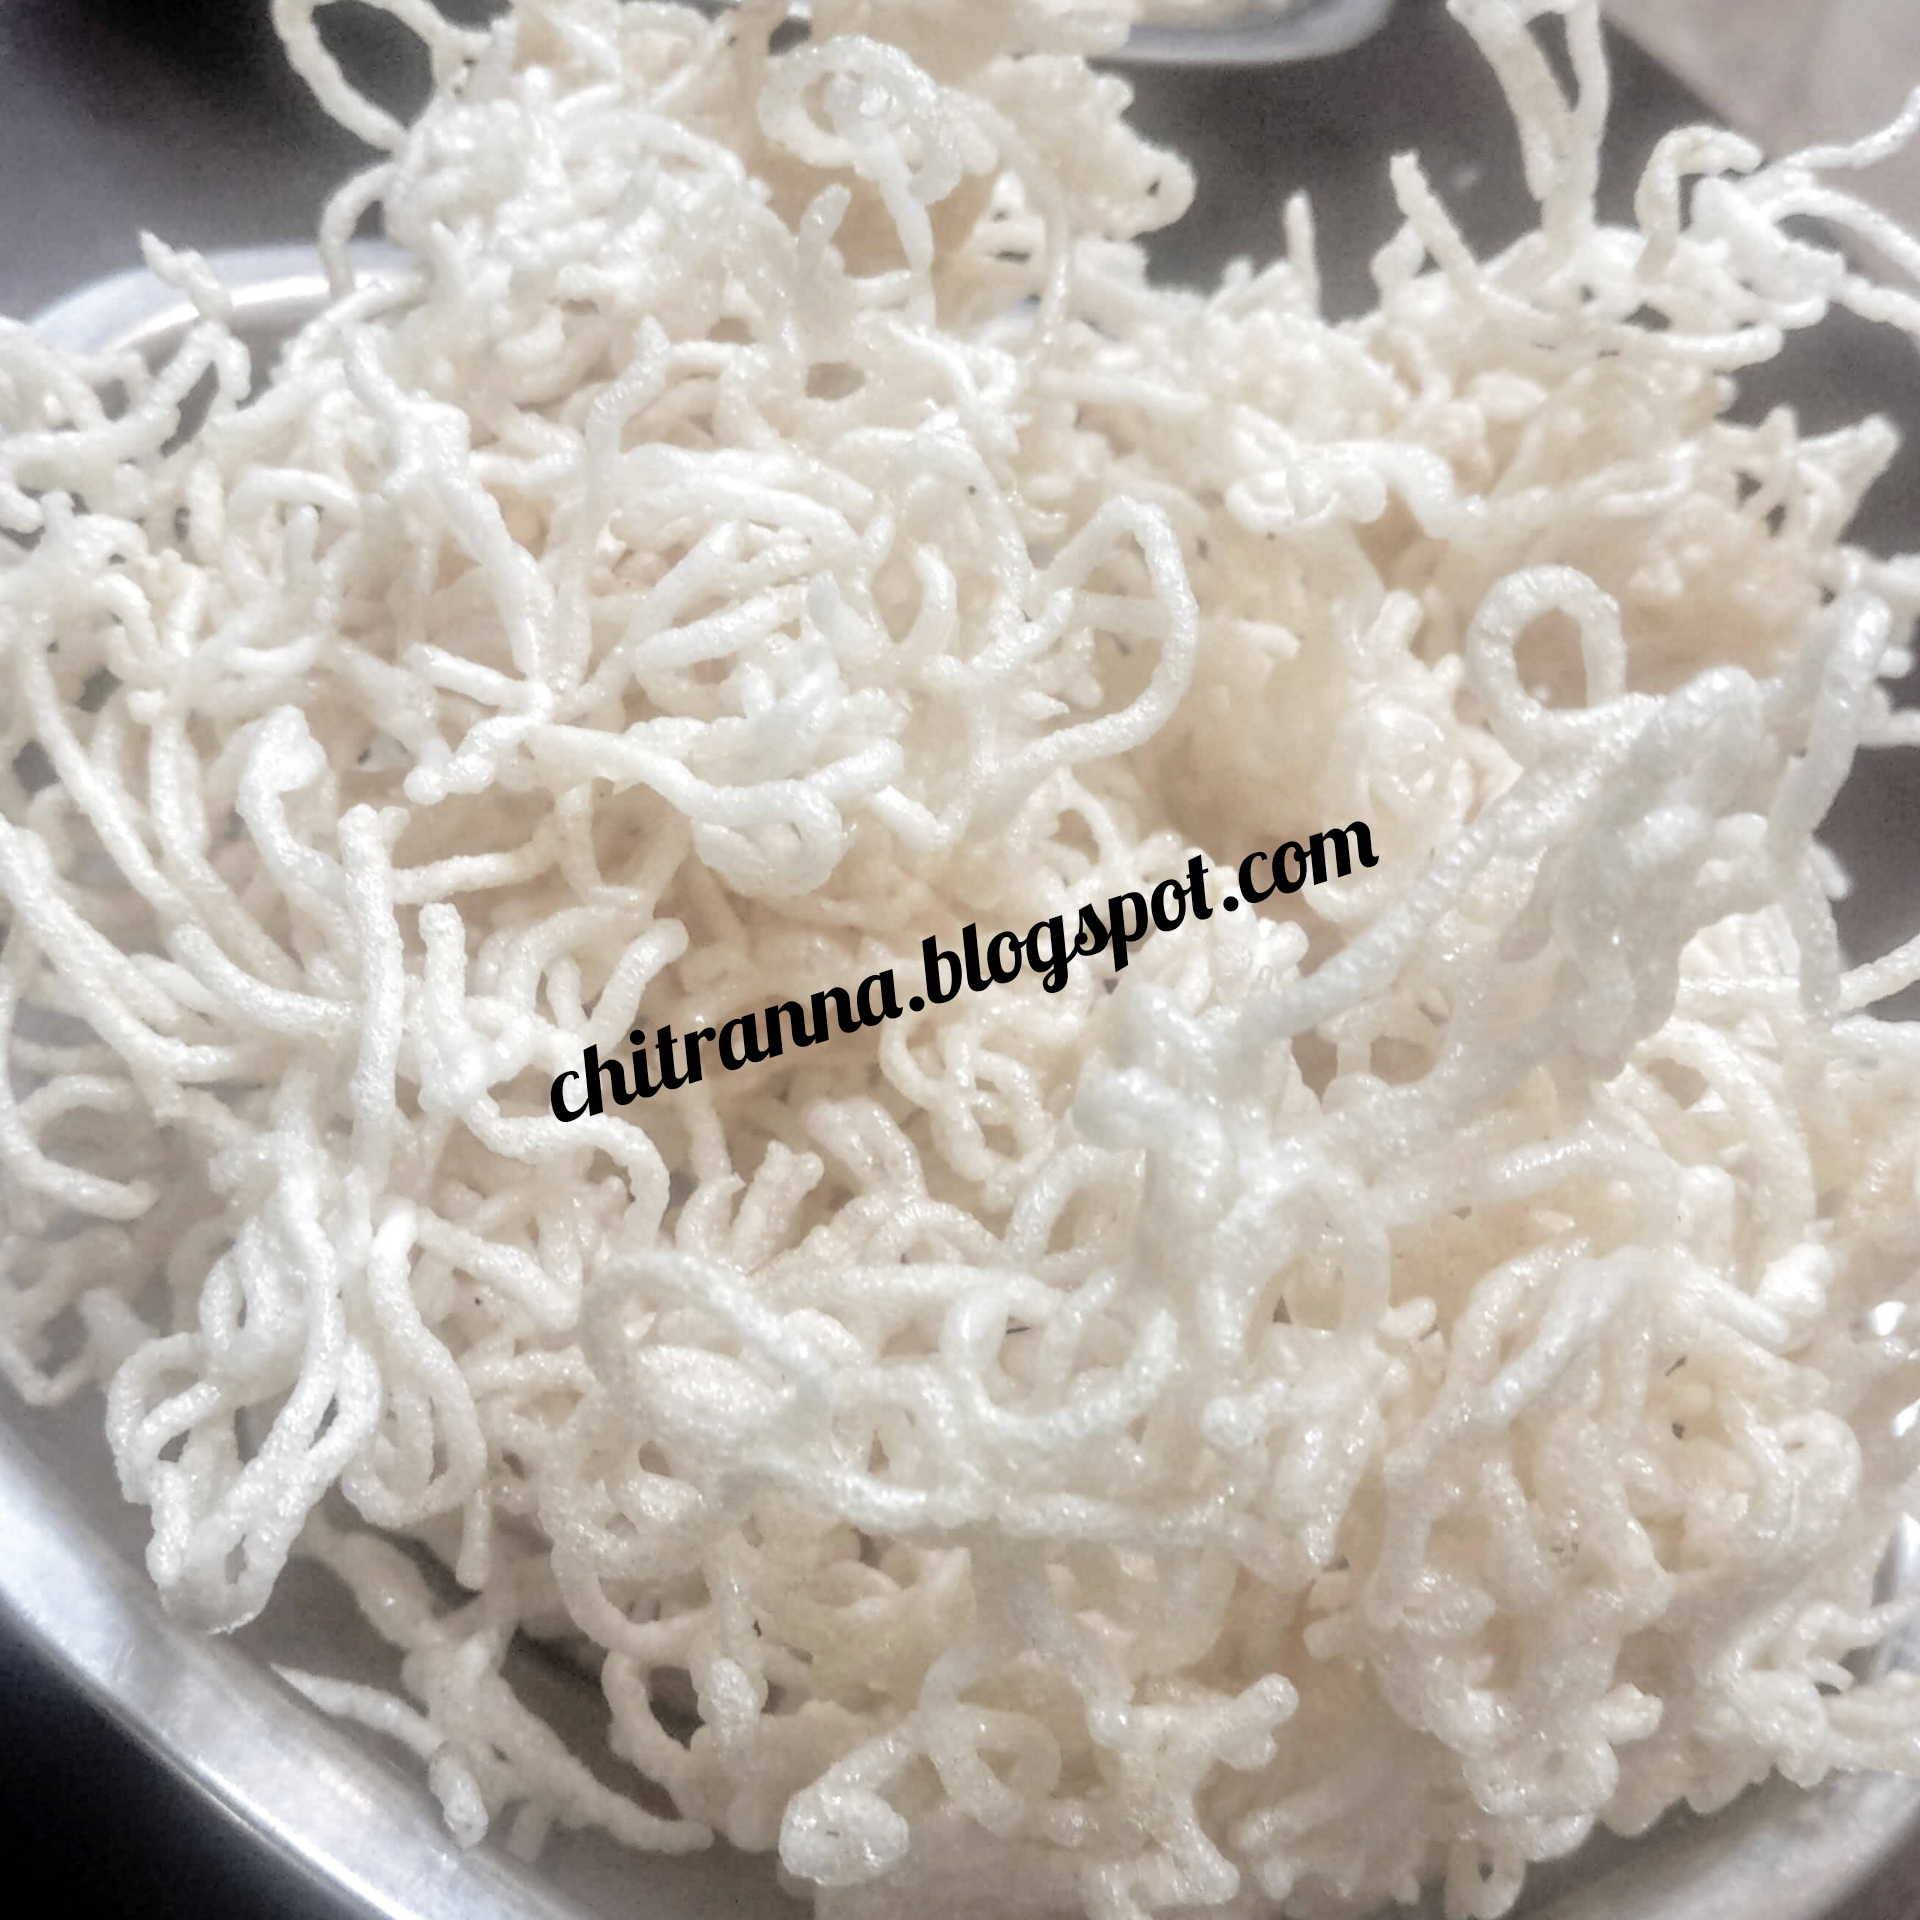
Akki Peni Sandige Recipe - Rice idiyappam Fryums | Pheni - Shavige Sandige - Rice Fryums


Ingredients :

Rice 250 grams or 2 big cups
Asafoetida 1 teaspoon
Groundnut oil 1 tablespoon
Salt to taste


RECIPE VIDEO 


Procedure :


Here I am sharing the age old traditional method which makes yummy Sandige. It can be made directly with rice flour but the taste differs. Choice is yours!


  • Wash and soak the rice in the night.
  • Next night remove the water, wash the rice and soak again in fresh water.
  • Repeat this procedure on the second night also.
  • On the third night drain the water and grind the rice to a fine paste and let it rest overnight.
  • In the morning, drain out the top water.
  • Measure the rice batter and add one and a half measure water. That is for one measure of batter add one and a half measures of water.
  • Mix thoroughly taking care to see that there are no lumps in the batter.
  • Smear the groundnut oil to a thick bottomed kadai.
  • Pour the batter to this kadai, add asafoetida and salt and keep it on the gas stove to cook.
  • Keep stirring continuously to see that no lumps are formed and the batter is cooked evenly.
  • Within a few minutes the batter starts to thicken.
  • Keep stirring it till the batter is fully cooked and becomes very thick. Please watch the video to get a clear idea.
  • Now switch off the gas and shift the batter to a vessel.
  • You can put the Pheni on a thick plastic cover spread on the terrace or in steel plates.
  • If you are putting in a steel plate, smear a layer of groundnut oil to the plate.
  • Make balls from the thick batter and keep them ready. It helps to put the sandiges quickly.
  • Now grease the inside of the chakli maker.
  • Take a ball of the batter, place it inside the chakli maker and press the phenis.
  • Like this put all the sandiges.
  • By the way the hot Sandige hittu tastes yummy. In fact on so many days we make the Sandige hittu with normal rice flour just to eat!
  • It tastes exceptional when it's hot, when it turns cold, when you pick a sandige and eat, when it's half dry, when it's fully dry and finally when it's fried!!! 
  • In the evening reverse the sandiges. 
  • Let them dry completely for another 2-3 days in the direct sun light.
  • Deep fry the dried Sandiges. You can eat them along with the  meals or as evening snacks.
  • Store the remaining Sandiges in an airtight jar which can be used throughout the year.


Check the recipes of some of our delicious snacks : 


Creamy Cheesey Pasta in White sauce


Kuttavalakki with Sandige


TENGOLU - The crispy tasty snacks from India


Snacks - Instant Delicious Chakli


Avalakki Chooda


And here are the recipes for different types of Sandige :


Gulabi Sandige 

Aralu Sandige - Puffed Paddy Fryums


Wednesday, 20 March 2019

Papad Cone Chaat recipe | sweetcorn chat in masala papad cone | papad katori chaat | Masala happala cone with corn chaat


These Yummy Papad Cones filled with Masala Sweet Corn serve as a great starter or yummy evening snacks or a show stopper for a fun filled party.

Preparation Time 20 Minutes
Cooking Time       10 Minutes

Ingredients :


  • Masala Papads 10
  • Sweet Corn         1 packet
  • Finely chopped onions 2
  • Finely chopped carrots 2
  • Finely chopped tomato 1
  • Finely chopped capsicum 1
  • Finely chopped coriander  1 cup
  • Lemon 1
  • Butter 2 cubes
  • Chilli flakes 1 tablespoon
  • Chaat masala 1 tablespoon
  • Salt to taste


Procedure :


  • Cut the masala papad into halves.
  • Heat the tava.
  • Dry roast the papad by pressing it on the tava using a cloth.
  • When it is roasted on both the sides immediately take it on the cloth in your left hand and turn it into a cone with your right hand. ( Please watch the video to know how to make the papad cone )
  • Place the cone in a glass or steel cup for a minute so that it retains the shape.
  • Make the cones for all the papads and set aside.
  • Boil the sweet corns for 5 to 6 minutes till they are fully cooked.
  • Drain them and set aside.
  • Heat the butter in a thick bottomed pan, add the cooked corn and saute for a minute.
  • Now in a bowl add the corns, all the chopped vegetables, chilli flakes, chaat masala, salt and squeeze the lemon.
  • Mix well and adjust the heat and salt. Instead of chilli flakes you can also add the finely chopped green chillies.
  • Now take the roasted papad cone and fill the masala corn into it.
  • Serve fresh corn papad cone as a starter or enjoy as an evening chaat.


Please check our other yummy snacks and chaats recipes here :

DAHI PURI


Thursday, 14 March 2019

Gulabi Sandige recipe | Rice Crispies | akki sandige | gulabi puvvulu vadiyalu | rice flour rose flowers vadiyalu


  • Ingredients :

  • Rice 200 grams or 2 big cups
  • Asafoetida 1 teaspoon
  • Groundnut oil 1 tablespoon
  • Salt to taste

RECIPE VIDEO


Procedure :


Here I am sharing the age old traditional method which makes yummy Sandige. It can be made directly with rice flour but the taste differs. Choice is yours!


  • Wash and soak the rice in the night.
  • Next night remove the water, wash the rice and soak again in fresh water.
  • Repeat this procedure on the second night also.
  • On the third night drain the water and grind the rice to a fine paste and let it rest overnight.
  • In the morning, drain out the extra water.
  • Measure the rice batter and add double it's quantity of water. That is for one measure of batter and two measures of water.
  • Mix thoroughly taking care to see that there are no lumps in the batter.
  • Smear the groundnut oil to a thick bottomed kadai.
  • Pour the batter to this kadai, add asafoetida and salt and keep it on the gas stove to cook.
  • Keep stirring continuously to see that no lumps are formed and the batter is cooked evenly.
  • Within a few minutes the batter starts to thicken.
  • Keep stirring it till the batter is fully cooked and becomes thick.
  • If you press the ladle in the batter and lift, the batter should stand. See the video of you have any doubt or confusion.
  • Now switch off the gas and shift the batter to a vessel.
  • You can put the Gulabi Sandige either on  thick plastic cover spread on the terrace or in steel plates.
  • If you are putting in a steel plate, smear a layer of groundnut oil to the plate.
  • You should start putting the sandiges when the batter is still hot.
  • To manage the heat, keep cold water in a bowl so that you can place your palm in the water whenever you feel the heat of the batter as unbearable.
  • Now take the batter in your hand and put the sandiges. They will look like a reverse rose flower or a Momo.
  • Again please check the videos for clarity.
  • Like this put all the sandiges.
  • By the way the hot Sandige hittu tastes yummy. In fact on so many days we make the Sandige hittu with normal rice flour just to eat!
  • It tastes exceptional when it's hot, when it turns cold, when you pick a sandige and eat, when it's half dry, when it's fully dry and finally when it's fried!!! 
  • In the evening reverse the sandiges. 
  • Let them dry completely for another 2-3 days in the direct sun light.
  • Deep fry the dried Sandiges. You can eat them along with the  meals or as evening snacks.
  • Store the remaining Sandiges in an airtight jar which can be used throughout the year.


Saturday, 9 March 2019

Kallangadi Tirulina Dosa - Watermelon rind Dosa

chitrannaa.blogspot.com


Preparation Time  :  15 minutes
Cooking Time       :  10 minutes

Ingredients :


  • Rice 3 cups
  • Poha ( Dappa avalakki ) 1 cup
  • Grated coconut 1 small cup
  • Watermelon rind 1 cup
  • Methi seeds 1 tablespoon
  • Groundnut oil 1/2 cup.
  • Salt to taste.


Procedure :


  • Soak the rice and methi seeds in water in the morning.
  • Soak the poha in the evening for 15 minutes before grinding.
  • In a mixie jar grind the rice, poha, soaked methi seeds, grated coconut and watermelon rind to a fine paste.
  • Add water to make dosa batter to a set dosa batter consistency.
  • Set aside the batter overnight.
  • In the morning add salt to the batter.
  • Heat the tawa.
  • Pour the batter and spread lightly without pressing.
  • It should be thick like set Dosa. Don't make it thin.
  • Put a teaspoon of groundnut oil all over it and cover the lid.
  • After a minute or two, flip the dosa.
  • Again add a teaspoon of oil.
  • When cooked on both sides, remove from the tawa.
  • Serve hot with coconut chutney.


Friday, 8 March 2019

Ven pongal recipe | Khara Pongal recipe | how to make khara pongal

chitrannaa.blogspot.com


Preparation Time  : 10 Minutes
Cooking Time       :  30 Minutes

Ingredients :


  • Rice  2 cups
  • Green gram daal ( Hesaru Bele ) 2 cups
  • Jeera 1/2  Tablespoon
  • Black Pepper crushed 1/2  Tablespoon
  • Ghee 2 Tablespoon
  • Turmeric powder 1/2 teaspoon
  • Cashew nuts 10-12
  • Slit green chillies 4
  • Finely chopped ginger 1 teaspoon
  • Grated fresh coconut 2 tablespoon
  • ( You can also use finely chopped coconut pieces )
  • Curry leaves 10
  • Coriander leaves  A few
  • Salt to taste


Procedure :

You can cook this directly in a cooker or in a vessel inside a cooker.


  • Wash rice and green gram daal thoroughly in separate containers.
  • In a cooker heat 1 tablespoon ghee.
  • Put in the washed rice and green gram daal in the cooker and saute for 2-3 minutes.
  • Next add 6 cups of water.
  • Put in 1/4 teaspoon of turmeric powder, salt, half of the coriander and curry leaves, grated coconut, 1/4 teaspoon jeera and 1/4 teaspoon crushed pepper seeds.
  • Cook in the pressure cooker for 5 whistles.
  • Once it's cool take out and check the consistency.
  • If it has become thick, add some water and cook on low heat for a few minutes. 
  • In a thick bottomed kadai, heat 1 tablespoon ghee.
  • Add the slit chillies, cashew nuts, ginger pieces, other half of coriander and curry leaves.
  • Saute for a few minutes and add this to the pongal.
  • Serve hot with a spoon full of ghee and Hasi Gojju.


Hasi Gojju :

Ingredients :


  • Jaggery powder 1 cup
  • Tamarind pulp    3/4 cup
  • Fried sesame seeds' powder 1 cup


For Tadka :


  • Groundnut oil 2 teaspoon
  • Mustard seeds 1/2 teaspoon
  • Asafoetida 1 pinch
  • Turmeric powder 1/4 teaspoon
  • Curry leaves 5-6
  • Menthe menasinakai 4
  • Salt to taste


Procedure :

Add water to the jaggery powder and mix well till the jaggery melts completely.
To this add tamarind pulp and fried sesame seeds' powder.
Now add salt and check the taste and adjust the jaggery and tamarind.
It should taste both sweet and sour.
Now make the tadka using all the above mentioned items.
Crush the menthe menasinakai with your hands to make it coarse powder.
Mix to the Hasi Gojju.

The pongal tastes extremely good with both a spoon of ghee and with Hasi Gojju.


Sunday, 3 March 2019

Aralu Sandige recipe - Puffed Paddy Fryums - Karnataka Style Aralu Sandige Recipe - Puffed Paddy Fryums


The summer is here.
Heat, dust, thirst, sweat....
Yes. But look at the brighter side.
Juices, ice creams, milk shakes, grapes, oranges, watermelon...
But of course Mango.


And the most interesting event happening during the summer is the making of Sandige.
The preparation, the purchases, the making and the eating... Every part of Sandige can be most rewarding and entertaining.

I always cherish and enjoy the making of Sandige, right from my childhood when Amma used to make Sandige with her friends to now when I make with my sisters and children would be eagerly waiting to eat the Sandige at every stage.


Eating the fresh hot Sandige hittu to picking the half dry sandiges to finally relishing the fried Sandige...


The making of Aralu Sandige used to be an yearly ritual, stretching upto a month because of the cleaning of the Aralu involved. Weekdays being busy with office work and the children with their exams, it used to be only during the weekends and also when the summer holidays started that the activity was gaining the momentum.

Not just my children, my husband used to drag my niece and also the friends of my children to clean the aralu.

But fortunately now we get the cleaned Aralu for a little extra in Rama traders in Gandhi Bazaar which is a big relief.


Check the recipes of some of our delicious snacks : 


Creamy Cheesey Pasta in White sauce


Kuttavalakki with Sandige


TENGOLU - The crispy tasty snacks from India


Snacks - Instant Delicious Chakli


Avalakki Chooda


So here goes the recipe :

The quantity I have mentioned here is enough for a family of four to last for almost an year if you use them sparingly.

Ingredients :


  • Aralu                              20 liter
  • Sabbakki -  sago          1 kg. Adjust this according to your liking.
  • Finely chopped onion 3 kg.
  • ( You can use other vegetables like ash gourd , potato or even do plain Sandige, but my personal preference is onion)
  • Coarsely ground green chillies 1/2 kg.
  • Asafoetida.                    1 tablespoon
  • Groundnut oil                1 cup
  • Salt to taste.


Procedure :


  • Wash and soak the sago/sabbakki overnight. The ratio of water to sago is 1:3 i.e for 1 cup of sago fill in 3 cups of water. You still need to add water while cooking the sabbakki in the morning.
  • In the morning apply a layer of groundnut oil in a thick bottomed kadai. This is to avoid burning of the sago while cooking.
  • Heat the water in the kadai.
  • While the water starts to boil, lower the heat and add the overnight soaked sago. If the quality is more for one kadai, you can split it into two kadais.
  • Mix the sago in the kadai and keep stirring at regular intervals.
  • When it starts boiling, add the salt, asafoetida and the coarsely ground chillies.
  • Keep stirring continuously and adjust the water if required.
  • When the sago cooks and thickens, switch off the gas and let it cool.
  • The consistency should be such that when it turns cold, the consistency should be thick yet flowing like dosa batter.
  • I use a plastic bowl with holes as shown in the picture to wash my Aralu so that it doesn't get over soaked.
  • Spread the thick plastic sheet on the terrace.


  • In a big bowl add a few ladles of sago mix, 2 cups of finely chopped onion and salt and mix thoroughly.
  • Now take a bowl full of aralu and hold it below the running water of a tap.
  • Once the top layer is wet, close the tap and shake in such a way that the aralu at the bottom comes to the top.
  • Again hold the aralu under the tap and see that all the aralu are wet.
  • Shake well so that all the water is drained.
  • Now put this aralu into the mixture of sago and onion prepared earlier.
  • Next mix gently so that the aralu don't break.
  • Check the taste and see that the salt and the chillies are perfect. Add either if required.
  • Now take a little mixture in your hand, and lightly shape it round without pressing it hard and place it on the plastic sheet. Keep doing like this for all the mixture you have prepared and then mix the next round.
  • In the evening the sandiges are to be reversed, kept upside down.
  • Next day if you want, you can shift the sandiges to steel plates or let it dry on the plastic sheet only.
  • After drying them crisp for about 2-3 days, keep the sandiges in an airtight container.


Sunday, 24 February 2019

Akki Ganji recipe - Rice Porridge reciope - easy breakfast recipe


chitranna.blogspot.com


Rice Ganji or Akki Ganji, the light Porridge, light on the tummy and extremely healthy, is one of my favorite healthy dishes.

I love this ganji because it's devoid of any heavy spices yet sings on your palate. Ganjis are generally prepared using rava - sooji, ragi or broken rice. But rice ganji is light yet filling. Unlike other ganjis which are generally prepared when one is down with an upset stomach or fever, I prepare this ganji on days when I want to avoid spicy food, yet want to eat something healthy and delicious. Many of you may know that this rice ganji is generally prepared in the temples on the dwadashi day morning food since after starving on the ekadashi day, this works lightly on the empty tummy and brings back the system from starving day to full meals day.


So go ahead and enjoy this delicious ganji. It takes minimum preparation time and is cooked in minutes.

RECIPE VIDEO :


Preparation Time : 2 minutes
Cooking Time :  15 minutes

Ingredients :


 ( serves 2 )

Rice.                    1 cup
Ghee                   1 table spoon
Jeera                   1 teaspoon
Grated coconut 1 table spoon
Asafoetida         1 pinch
Finely cut ginger pieces 1/4 teaspoon
Curry leaves     6
Coriander leaves a few
Salt to taste


Procedure :


This can be prepared directly on the stove in a vessel but as it requires constant monitoring by keeping on mixing it so that it doesn't get burnt, I make this in cooker.


  • Wash the rice thoroughly.
  • Add water at the ratio of 1 : 8, that is for one cup of rice you add 8 cups of water.
  • Add the finely cut ginger pieces. I prefer adding finely cut pieces and not the grated ones because it tastes great when you bite those mildly hot and sweet ginger in the porridge.
  • Mix the grated coconut, 1/2 teaspoon jeera, 1/2 tablespoon ghee, coriander and curry leaves and salt.
  • Cook the ganji in the cooker for 5 whistles. Before switching off, let it simmer for a few minutes in low heat and then switch off the gas.
  • In a thick bottomed kadai heat the other 1/2 tablespoon ghee, add jeera and asafoetida and mix the ganji.
  • Adjust by adding the water and salt according to your taste and liking.
  • Serve hot with ghee, lemon pickle or gojju.


Rava Pongal


Friday, 22 February 2019

garden humour | Monkey Baat - how to keep monkey away from my garden


chitrannaa.blogspot.com


This is my harvest today.
There is an interesting story behind this bountiful harvest. In my tussle with the monkeys over my garden veggies, today both of us got one point each.

How to beat the monkeys to have first claim over my garden produce? When I decided to have this "monkey baat" with my family and my friends, many suggestions came.

To build a grill around my garden.
No sir, being a nature lover, I love the sky as much as I love the earth. I don't want to look at stars through the bars.

Put a stuffed lion toy.
Ok.
I got a lion toy and put it on the terrace.
On the next day when there was a commotion on the terrace, I ran upstairs, hoping that my lion would have scared the monkeys.
Guess what??
About three to four monkeys were pulling my lion from all the directions, each wanting to play with it!!
Finally one big fella won the match, dragged my lion across the terrace and finally sat on it. Seriously???


And yet someone suggested to burst the crackers when the monkeys come.
Unfortunately the monkeys are not like our netas nor like Lord Ganesha.
They come unannounced.
According to their whims and fancies.
And the crackers are lying idle.
No sir.
I burst the crackers only when India beats Pakistan. On the field or off the field.
Either when Virat wins or when Modiji wins.
Period.

Then a friend suggested to put a berchappa - a scary doll in the terrace.
Are you kidding?
When I stand there right in front of them holding a stick, with my red angry face glaring, they give me a look of utter contempt.
As if telling me that they care two hoots for my antics.
So when a live berchappa can't scare them, and a stuffed lion becomes their toy, I can very well imagine how they would drag my berchappa on the road and people would be scared that the monkeys have murdered a human being and dragging his body!
Scary. Isn't it??

When I lamented with my sister Shobha that the monkeys are neither scared of the lion nor of my scary angry face, she came up with a brilliant idea.
That I should myself dress up like a berchappa and stand there.
And then when the monkeys come I should swing my arm with a stick.
Really?
Are you serious?
Are you serious??
Are you serious???
She ran away before I could swing a stick at her!


Then I came up with a brilliant idea. I thought that the monkeys will eat my vegetables only if they can see them. What if I put a cap on my veggies and cover them.

Patting myself on my back for my smart idea, I brought some thick non transparent plastic covers and put on all my tomatoes, brinjals and cucumbers.

Alas! The brilliant me committed a silly mistake and monkeys beat me again with their smartness.
Oh!
But Darwin says that we are the evolved species!!!
Darn the monkeys!
I stand corrected.
The monkeys beat me with their crookedness.

I had thought that I had covered all the veggies! But while covering I was looking at the veggies from my height, and forgot that the monkeys would be roaming on my terrace at 2 feet and can easily look up and see the veggies hiding under the plastic covers. Silly me!

What?
Are you guys having fun?
Laughing at me that I can't do anything and the monkeys are winning over me?
Think again.

Watch HERE to see what I did to beat them!!!
But then....

Tomorrow being the weekend, I had planned to do my harvest.
And today they arrived.


But in the match between the two of us, today both of us won a point each.
They would always beat me to pick tomotoes.
And brinjals.
And cucumbers.
I would always be waiting for my veggies to grow a little bigger and meanwhile the monkeys would beat me.
Oh Common. Can't you wait for some more days?
You would get a bigger vegetable. Idiot!

And this time I had meticulously draped my brinjals, tomatoes and cucumbers with cotton saree.
Did the monkeys buy it? Whether my idea was successful?
But of course!
So today the monkeys arrived.
One day before I had planned my harvest.

They could not see their regular tomatoes, brinjals, cucumbers.
And the beans.
I scored a brownie point.
End of my batting.

But could I burst the crackers?
Alas, No.

For more than a year, I have been growing cabbages. I have many pots filled with healthy cabbages. But never ever the monkeys had touched them.
Till today.
May be they had thought that the cabbage is just a plant.
May be they never knew that it's a veggie and they can really eat them.
May be because of the shape of the cabbage, they had presumed them to be flowers.
That's what I had thought.
I would like to think that that's what they would have thought and that that's the truth.
That they are dumbos.


But today they ate five of my big cabbages.
Not fully.
All the monkeys together ate some parts of five cabbages.
Idiots!
At least can't you finish the ones you have started and then go to the next one?
Can't you share one together?
And then go to the next?

So the next brownie point went to the monkeys.
They batted equally well.

When is the second innings?

Not before I drape my cabbages with the sarees.

But not willing to take any chance with the other small cabbages, I have harvested all the cabbages today. And also the tomotoes.
And the brinjals.
And the greens.
And also the chillies.
Even the flowers.

Still there are many cabbages in the garden which are just growing.
Should I drape the cabbages also with the sarees?
Hope they will be safeguarded.

Results would be out after the second innings.

Who is the night watchman?
My stuffed lion.

Keep watching this space to know the results.......


You may also read our other interesting and useful gardening tips.......

1. Organic gardening method - How to grow veggies in a very very small place

2. Organic gardening medium - How to grow easily without soil and with less water

3. Organic gardening plants - What all the vegetables we can grow in 10x10 area 

4. Organic Manure composting - How to use your kitchen waste directly in your pots to compost and prepare organic manure

5. How to grow and harvest cabbages in containers 


Wednesday, 13 February 2019

ತೆರೆದಿದೆ ಮನೆ ಓ ಬಾ ಅತಿಥಿ.......

ಇಂದು ನನ್ನ ಬ್ಲಾಗ್ ನಲ್ಲಿ ನಾನು ಮೊದಲ ಬಾರಿ ನಿಮ್ಮೊಂದಿಗೆ ಕನ್ನಡದಲ್ಲಿ à²®ಾತನಾಡುತ್ತಿದ್ದೇನೆ......

ಆದರೆ ಇಲ್ಲಿ ಶಬ್ದಗಳ ಅವಶ್ಯಕತೆ ಇಲ್ಲ.
ನೋಡುವ ನೋಟ, ಆಸ್ವಾದಿಸುವ ಮನಸ್ಸಿದ್ದರೆ ಸಾಕು...


ಒಂದು ಸುಂದರ ಮುಂಜಾವು.
ಎಳೆ ಬಿಸಿಲು.
ತಂಪಾದ ಗಾಳಿ..
ಕರಗುತ್ತಿರುವ ಇಬ್ಬನಿ..
ಉದುರುತ್ತಿರುವ ಪಾರಿಜಾತದ ಹೂಗಳು...
ಮನೆಯಂಗಳದಲ್ಲಿ ಮೂಡಿರುವ ರಂಗೋಲಿ....
ಹಕ್ಕಿಗಳ ಚಿಲಿಪಿಲಿ....
ಕರುಗಳ ಅಂಬಾ.....
ನಸು ನಗುತ್ತಿರುವ ಮಲ್ಲಿಗೆ...
ಅವುಗಳನ್ನು ಮುತ್ತಿಕ್ಕುತ್ತ ಮಕರಂದ ಹೀರುತ್ತಿರುವ ದುಂಬಿಗಳು....
ಇಲ್ಲ...
ನಾನು ಕವಿಯಿತ್ರಿ ಅಲ್ಲ.
ಕವನ ಬರೆಯುತ್ತಿಲ್ಲ...
ನನ್ನ ಸುಂದರವಾದ ಗಿಡ ಮರ ಬಳ್ಳಿಗಳು, ನಾನು ಬೆಳೆಸಿದ ಹೂವುಗಳನ್ನು ನೋಡುವಾಗ ಹುಟ್ಟುವ ಭಾವುಕತೆ ಇದು.
ಈ ಸೌಂದರ್ಯವನ್ನು ನಿಮ್ಮೆಲ್ಲರೊಂದಿಗೆ ಹಂಚಿಕೊಳ್ಳುವ ಆಸೆ....
ಬನ್ನಿ.
ತೆರೆದಿದೆ ಮನೆ ಓ... ಬಾ ಅತಿಥಿ.....

ನನ್ನ ಮನೆಯ, ತೋಟದ ಈ ವಿಡಿಯೋ ನೋಡಿ...
ನಿಮ್ಮ ಅಭಿಪ್ರಾಯ ತಿಳಿಸಿ.....
ಇಷ್ಟವಾಯಿತಾ?
ನಿಮ್ಮ ಬಂಧು ಮಿತ್ರರೊಂದಿಗೆ, ಸ್ನೇಹಿತರೊಂದಿಗೆ ಹಂಚಿಕೊಳ್ಳಿ.....

ಮತ್ತೆ ಸಿಗುವವರೆಗೂ.....
ನಗುತ್ತಿರಿ...
ಸಂತೋಷದಿಂದಿರಿ......